The personal view on the IT world of Johan Louwers, specially focusing on Oracle technology, Linux and UNIX technology, programming languages and all kinds of nice and cool things happening in the IT world.
Wednesday, December 31, 2008
VirtualBox and virtual disks
I have been working now for some time with VirtualBox and I have to say, I love the product. However, one thing came to me as strange and unexpected. After giving it some thoughts it made a lot of sense. After using VirtualBox for some time and playing with the installation options I removed a couple of the VM's. After some time it came to my notion that my disk was becoming quite full.
!! When you remove a virtual machine you do NOT remove the disk image !!
So when I looked in virtualbox vdi directory I noticed all the vdi files which are around 10 Gig in size still there. When you create a virtual machine you first create a virtual disk, then you install the operating system on this disk. The disk is represented as a vdi file which has the size of the disk. When you remove the VM you also have to remove the disk. Just something you have to know, so clean up after yourself and remove the disks. This can be done via the Virtual Disk Manager.
About VDI, VDI stands for Virtual Disk Image. This is the standard that VirtualBox uses. You can also use VMDK which is the format for disks from VMware or you can use VHD from Microsoft.
Sunday, December 28, 2008
Install Apache Tomcat on Ubuntu
Because I will be using Tomcat at this moment still mainly for testing and coding while commuting from home to work and back I decided to install it on my virtual Ubuntu installation on my MacBook. I found out that installing Tomcat on Ubuntu is quite easy. I found a quick howto at howtogeek.com from which I followed most of the steps. Here is my fork of this howto.
1) Check your current java version.
As Tomcat is running Java code and is depending on Java you will have to have Java running on your system. Check your currently installed Java versions with the following command:
dpkg -l | grep sun
This should give you at least the following packages installed; sun-java6-bin, sun-java6-jdk and sun-java6-jre. If not you have to install Java on Ubuntu with the following command: sudo apt-get install sun-java6-jdk
Now when you check it again you should see the packages installed.
2) Install Tomcat
Installing tomcat can be done by downloading it from the tomcat website, currently this can be done from the following location: http://tomcat.apache.org/download-60.cgi
When you have downloaded Tomcat you have to unpack it and move it to /usr/local so that tomcat will be in /usr/local/tomcat/
3) Setting JAVA_HOME
One of the requirements of Tomcat is that the variable TOMCAT_HOME is set on your system and that it points to the java version you just installed. You can check this by executing env | grep JAVA_HOME which should (or should not) give you JAVA_HOME and the value of this variable. If this is not the case or the value is not pointing to the correct java version you have to change this. Lets say JAVA_HOME is not set, you have to edit .bashrc in your home directory so enter vi ~/.bashrc at the end of the file add the following: export JAVA_HOME=/usr/lib/jvm/java-6-sun
4)Startup script Tomcat
Now we would like to have tomcat to startup when you start your machine and shutdown correctly when you shutdown the machine. Create a file in /etc/init.d named tomcat and enter the following information:
# Tomcat auto-start
#
# description: Auto-starts tomcat
# processname: tomcat
# pidfile: /var/run/tomcat.pid
export JAVA_HOME=/usr/lib/jvm/java-6-sun
case $1 in
start)
sh /usr/local/tomcat/bin/startup.sh
;;
stop)
sh /usr/local/tomcat/bin/shutdown.sh
;;
restart)
sh /usr/local/tomcat/bin/shutdown.sh
sh /usr/local/tomcat/bin/startup.sh
;;
esac
exit 0
Now we have to make this script executable sudo chmod 755 /etc/init.d/tomcat . Now the script is executable we can do a tomcat start to start it, tomcat stop to make it stop and a tomcat restart to stop and start it again. However we would like to have it start and stop automatically. For this we create a start and stop link by executing the following two commands:
sudo ln -s /etc/init.d/tomcat /etc/rc1.d/K99tomcat
sudo ln -s /etc/init.d/tomcat /etc/rc2.d/S99tomcat
Now when you open http://localhost:8080 you will see the start page of tomcat in your browser. All set and ready to go.
Monday, December 22, 2008
High Performance Computing with Penguin Computing
"Penguin Computing is the leader in Cluster Virtualization, the most practical and cost-effective methodology for reducing the complexity and administrative burden of clustered computing. Our cluster solutions are driven by Scyld ClusterWare, whose unique architecture makes large pools of Linux servers appear and act like a single, consistent, virtual system, with a single point of command/control. By combining the economics of Open Source with the simplicity and manageability of Cluster Virtualization, we help you drive productivity up and cost out, making Linux clustering as powerful and easy to use as expensive SMP environments, at a Linux price point."
One of the things that Penguin Computing is providing is a ready to use 'out of the box' cluster. You get it all, the software, the hardware and all you need to get your cluster up and running. Even do this is not as much fun as building your own cluster with a team of people it is more efficient I think. The thing holding it all together by the solutions from Penguin Computing is the Scyld ClusterWare Linux clustering software. The Scyld ClusterWare is a set of tools to manage your cluster, or as they would like to call it "Scyld ClusterWare HPC is an HPC cluster management solution".
The Scyld ClusterWare cluster is controlled by the master node which hosts the scheduler, process migration, parallel libraries and the cluster management tools. Both cluster administrators and the users connect to the master node. The scheduler on the master node is enforcing the cluster policies so that you can create rules that for example work from a specific department has more priority in the cluster than that from an other. So jobs with a higher priority are scheduled before work with a low priority. TORQUE is the main workload management tool used within Scyld ClusterWare as a basic scheduler, for your more advanced scheduling requests Scyld TaskMaster, Scyld TaskMaster is an adaptation of the Moab Suite from Cluster Resources.
provisioning your computing nodes is done via a network boot where the master image is loaded into the RAM memory of the computing nodes. No need for local disks running a operating system. Specific libraries and drivers needed by the computing nodes are provided by the master node on request. The computing nodes are running a very very lean operating system which is stripped from all unneeded options. Only services which are needed to communicate with the master node are provided which makes more room for the real work to be done. If we look at other cluster setups we have in most cases a 'stripped' linux operating system with a lot of services running which are not really needed but who are hard to remove from the system.
On the website of Penguin Computing they state that they can provision a new node with a computing node operating system within a minute, this makes my provisioning of Oracle Enterprise Linux look very very slow. However, they are provisioning a very small operating system into RAM where I was provisioning a complete distribution to disk so that makes some difference. By using a single image and the quick provisioning they can make sure that all nodes in the cluster are running the same OS which is a good thing and makes it even more stable.
One more thing from the website I would like to share with you:
"Scyld ClusterWare is fully compatible with RedHat Enterprise Linux, supporting a huge variety of applications from all HPC disciplines such as Mechanical Computer-Aided Engineering (MCAE), Life Sciences, Computational Fluid Dynamics, Financial Services, Energy Services and Electronic Design Automation (EDA). Application Notes for applications such as ANSYS®, FLUENT®, LS-Dyna®, Blast, Matlab® and Schrodinger® (Prime/Glide/Jaguar) are available for customers through Penguin Computing's Support Portal".
From what I read at the website Penguin Computing is doing a great thing and they have a great solution, however, I would love to play with the system for a couple of days to get to know more of how it all is working. You can download a fully working Scyld ClusterWare for a test period of 45 days. Great, however, I do not have enough spare computers to build a test cluster. If Penguin Computing is having a road show somewhere in Europe I might take a flight to talk to some of the people and have a look at the system when it is in operation.
Saturday, December 20, 2008
Partition Decoupling Method
A group of researchers from Darmouth have developed a mathematical tool which can help understand complex data systems like the votes of legislators over their careers, second-by-second activity of the stock market, or levels of oxygenated blood flow in the brain.
“With respect to the equities market we created a map that illustrated a generalized notion of sector and industry, as well as the interactions between them, reflecting the different levels of capital flow, among and between companies, industries, sectors, and so forth,” says Rockmore, the John G. Kemeny Parents Professor of Mathematics and a professor of computer science. “In fact, it is this idea of flow, be it capital, oxygenated blood, or political orientation, that we are capturing.”
Capturing patterns in this so-called ‘flow’ is important to understand the subtle interdependencies among the different components of a complex system. The researchers use the mathematics of a subject called spectral analysis, which is often used to model heat flow on different kinds of geometric surfaces, to analyze the network of correlations. This is combined with statistical learning tools to produce the Partition Decoupling Method (PDM). The PDM discovers regions where the flow circulates more than would be expected at random, collapsing these regions and then creating new networks of sectors as well as residual networks. The result effectively zooms in to obtain detailed analysis of the interrelations as well as zooms out to view the coarse-scale flow at a distance."
Source Press Release
In a paper named "Topological structures in the equities market network" written by Gregory Leibon, Scott D. Pauls, Danile Rockmore and Robert Savell the Partition Decoupling Method is used to map the underlying structure of the equities market network.
"We present a new method for the decomposition of complex systems given a correlation network structure which yields scale-dependent geometric information — which in turn provides a multiscale decomposition of the underlying data elements. The PDM generalizes traditional multi-scalar clustering methods by exposing multiple partitions of clustered entities. "
More information can be found at:
http://www.sciencedaily.com/releases/2008/12/081216131022.htm
http://www.dartmouth.edu/~news/releases/2008/12/16.html
http://arxiv.org/pdf/0805.3470
Saturday, December 13, 2008
Cluster Computing Network Blueprint
"Designing real distributed systems requires consideration of networking topology."
Let say you are designing a Hadoop cluster for distributed computing for a company who will be processing lots and lots of information during the night to be able to use this information the next morning for daily business. The last thing you want is that the work is not completed during the night due to a networking problem. A failing switch can, in certain network setups, make that you loose a large portion of your computing power. Thinking about the network setup and making a good network blueprint for your system is a vital part of creating a successful solution.
We take for example the previously mentioned company. This company is working on chip research and during the day people are making new designs and algorithms which needs to be tested in your Hadoop cluster during the night. The next morning when people come in they expect to have the results of the jobs they have placed in the Hadoop queue the previous day. The number of engineers in this company is enormous and the cluster has a use of around 98% during 'non working hours' and 80% during working hours. As you can see a failure of the entire system or a reduction of the computing power will have a enormous impact on the daily work of all the engineers.
A closer look at this theoretical cluster.
- The cluster consists out of 960 computing nodes.
- A node is a 1u server with 2 quad core processors and 6 gigabyte of ram.
- The nodes are placed in 19' racks every rack houses 24 computing nodes.
- There are 40 racks with computing nodes.
As you can see, if we would lose a entire rack due to a network failure we would lose 2.5% of the computing power. As the cluster is used 98% during the night we would not have enough computing power to do all the work during the night. Losing a single node will not be a problem, however losing a stack of nodes will result in a major problem during the next day. For this we will have to create a network blueprint in which we can ensure that we will not lose a entire computing stack. If we talk about a computing stack we talk about a rack of 24 servers in this example.
First we will have to take a look at how we will connect the racks, if you look at the Cisco website you will be able to find the Cisco Catalyst 3560 product page. The Cisco Catalyst 3560 has 4 Fiber ports and we will be using those switches to connect the computing stacks. However, to ensure the network redundancy we will use 2 switches for very stack instead of one. As you can see in the diagram below we crosslink the switches. SW-B0 and SW-B1 will both be handling computing stack B, switches SW-C0 and SW-C1 will be handling the network load for computing stack C etc etc. We will be connecting SW-B0 with fiber to SW-C0 and SW-C1. We will also connect SW-B1 with fiber to SW-C0 and SW-C1. In case SW-B0 or SW-B1 will fail the network can still route traffic to the the switches in the B computing stack and also the a computing stack. By creating the network in this way the network will not fail to route traffic to the other stacks, the only thing that will happen is that the surviving switch will have to handle more load.
This setup will however not solve the problem that the nodes that are connected to the failing switch will loose the network connection. To resolve this we will attache every node to two switches. Every computing stack has 24 computing nodes. The switch has 48 ports and we do have 2 switches. To solve this problem we place 2 network interfaces in every node. One will be in standby mode and one will be active. To spread the load at all even numbered nodes the active NIC will be connected to switch 0, at all uneven numbered nodes the active NIC will be connected switch 1. For the inactive (standby) NIC, all the even numbered nodes will be connected to switch 1 and all uneven numbered nodes will be connected to switch 0. In a normal situation the load will be balanced between the two switches, in case one of the two switches fails the standby NIC's will have to become active and all the network traffic to the nodes in the computing stack will be handled by the surviving switch.
To have the NIC's to switch to the surviving network switch and to make sure that operation continue as normal you will have to make sure that the network keeps looking at the servers in the same way as before the moment one of the switches failed. To do this you will have to make sure that the new NIC has the same IP address and MAC address. To do so you can make use of IPAT, IP Address Takeover.
"IP address takeover feature is available on many commercial clusters. This feature protects an installation against failures of the Network Interface Cards (NICs). In order to make this mechanism work, installations must have two NICs for each IP address assigned to a server. Both the NICs must be connected to the same physical network. One NIC is always active while the other is in a standby mode. The moment the system detects a problem with the main adapter, it immediately fails over to the standby NIC. Ongoing TCP/IP connections are not disturbed and as a result clients do not notice any downtime on the server. "
Now we have tackled almost every possible breakdown, however what can happen is that not one switch but both switches in stack break. If we look at the examples above this would mean that the stacks will be separated by the broken stack. To prevent this you will have to make a connection between the first and the last stack as you make between all the stack. By doing so you make a 'ring' of your network. With correct setup of all your switches and making good routing a failover routings your network can also handle the malfunction of a complete stack in combination with both switches in the stack.
Even do this is a theoretical blueprint, developing your network in such a way in combination with writing your own code to controle network flows, scripts to control the IPAT and the switching back of IPAT, thinking about reporting and alerting mechanisms will make a very solid network. If there are any questions about this networking blueprint for cluster computing please do send me a e-mail or post a comment. I will reply with a answer (good or bad) or explain things in more detail in a new post.
Friday, December 12, 2008
Fix your macbook
Now comes the tricky part, it might be that you no longer have a a warranty or that you have to turn in your machine and you are not willing to. In those cases you still have a second option. You can look at which parts are broken and go to the iFixit website and order the parts. iFixit have a lot of mac spareparts on stock. Also they provide you with step by step instructions on how to change the parts that are broken.
Tuesday, December 09, 2008
Cluster Computing and MapReduce Lecture 1
Some quick nice quotes:
- Parallelization is "easy" if processing can be cleanly split into n units.
- Processing more data means using more machines at the same time.
- Cooperation between processes requires synchronization.
- Designing real distributed systems requires consideration of networking topology.
Aaron will go into the fundamentals and in the upcoming lectures we will dive into more details. you can review the presentation here below. You can also find all the shows on the Google code site and some of the questions and answers. I will also post the other shows with some of my comments after I have viewed them.
Virtualbox and Oracle Enterprise Linux
Uncompressing Linux.... 0k, booting the kernel
The problem is that virtualbox is incapable of handling some of the SMP kernel options when you start the kernel. Currently a bug is reported at Sun to fix the problem. A workarround for this problem is to boot the Enterprise-up (2.6.9-78.0.0.0.1.EL) kernel instead of the Enterprise (2.6.9-78.0.0.0.1.ELsmp) kernel.
It is not the best workarround but you can get a OEL system running in a virtualbox. When you like to default the system to start with this kernel you have to edit the file /boot/grub/grub.conf and change the default=0 to default=1. In my case the 1 is the Enterprise-up (2.6.9-78.0.0.0.1.EL) kernel which can start with virtualbox.
Sunday, December 07, 2008
Oracle cloud computing
Running more than one operating system on a single server or making a large server by deploying a couple of small servers instead of buying a large expensive server. Now there is an other alternative which can help cutting IT budgets. Oracle is for some time now working with Amazone on cloud computing. Amazone is providing Amazon S3 "Amazone Simple Storage Service" and Amazon EC2 "Amazon Elastic Compute Cloud". As I already pointed out in a previous article about Oracle and Amazone teaming up and I posted a article about amazon EC2 and python.
So it is possible to run your Oracle database and applications within the Amazone computing cloud and store information at the Amazone storage service. This will make that you can minimize your own hardware infrastructure while providing your users with the same, or even higher' level of service.
"Oracle customers can now license Oracle Database 11g, Oracle Fusion Middleware, and Oracle Enterprise Manager to run in the AWS cloud computing environment. Oracle customers can also use their existing software licenses on Amazon EC2 with no additional license fees. And for on-premise Oracle installations, AWS offers a dependable and secure off-site backup location that integrates seamlessly with Oracle RMAN tools."
On the RMAN part, Oracle has released "Oracle Secure Backup Cloud Module". This module is a extension on the RMAN functionality, you are now able to backup your database to a storage cloud, for example Amazone S3. The nice part of this module is that you can backup a database that you are running in your own datacenter into the cloud. This means you encrypt and compress your backup and send it to the storage cloud instead of doing a backup to tape or a backup to disks. You send your data to Amazone automatically like you are doing a backup as you normally would do.
The other part is that, if you run your database in the Amazone Elastic Compute Cloud you can also backup your Oracle database to Amazone S3. When you run your database in your own datacenter you can have the bandwidth as a bottleneck even do the backup cloud module uses the 11G fast compressed backup feature it can still be a lot of data. If you run your database at the EC2 you will not have to worry about the bandwidth in your datacenter because the bandwidth between the computing cloud and the storage cloud is handled by Amazone.
So when you are looking for ways to reduce the datacenter costs it can be worth to look into what Amazone is providing for Oracle customers at the moment.
Oracle XEN, VT-x and VT-i
When running for example windows on a XEN or Oracle VM machine you will need to have a hardware platform that enables hardware virtualization. If not you will not be able to run windows virtually on your Oracle VM machine. For the intel processors the most are proving you with VT-x or VT-i support, you can check out the current processors at the intel website and get more details there. http://www.intel.com/products/processor_number/eng/
VT-x is the code name for virtualization support for the IA-32 (Intel Architecture, 32-bit), often generically called x86 or x86-32 processors. VT-i is the code name for virtualization support for the IA-64 processors.
Some of the things the intel VT-x and VT-i technology is doing an helping XEN and Oracle VM are the following:
"Address-space compression. VT-x and VT-i provide two different techniques for solving address-space compression problems. With VT-x, every transition between guest software and the virtual machine monitor (VMM) can change the linear-address space, allowing the guest software full use of its own address space. The VMX transitions are managed by the virtual machine control structure (VMCS), which resides in the physical-address space, not the linear-address space. With VT-i, the VMM has a virtual-address bit that guest software cannot use. A VMM can conceal hardware support for this bit by intercepting guest calls to the processor abstraction layer (PAL) procedure that reports the number of implemented virtual-address bits. As a result, the guest will not expect to use this uppermost bit, allowing the VMM exclusive use of half of the virtual-address space."
"Ring-aliasing and ring compression. VT-x and VT-i eliminate ring-aliasing problems because they allow a VMM to run guest software at its intended privilege level. Instructions such as PUSH (of CS) and br.call cannot reveal that software is running in a virtual machine. VT-x also eliminates ring compression problems that arise when a guest OS executes at the same privilege level as guest applications."
For more information about the br.call processor instruction you can look at this intel document. The IA-64 br.call instruction is the equivalent of the x86 CALL instruction. Microsoft has a article the MSDN website with more information about the IA-64 registers.
"Non-faulting accesses to privileged state. VT-x and VT-i avoid problems of non-faulting accesses to privileged state in two ways: by adding support that causes such accesses to transition to a VMM and by adding support that causes the state accessed to become unimportant to a VMM. A VMM based on VT-x does not require control of t he guest privilege level, and the VMCS controls the disposition of interrupts and exceptions. Thus, it can allow its guest access to the GDT, IDT, LDT, and TSS. VT-x allows guest software running at privilege level 0 to use the instructions LGDT, LIDT, LLDT, LTR, SGDT, SIDT, SLDT, and STR. With VT-i, the thash instruction causes virtualization faults, giving a VMM the opportunity to conceal any modifications it may have made to the VHPT base address."
LGDT : Load Global Descriptor Table Register
LIDT : Load Interrupt Descriptor Table Register
LLDT : Load Local Descriptor Table Register
LTR : Load Task Register
SGDT : Store Global Descriptor Table Register
SIDT : Store Interrupt Descriptor Table Register
SLDT : Store Local Descriptor Table Register
STR : Store Task Register
"Guest transitions. Guest software cannot use the IA-32 instructions SYSENTER and SYSEXIT if the guest OS runs outside privilege level 0. With VT-x, a guest OS can run at privilege level 0, allowing use of these instructions. With VT-i, a VMM can use the virtualization-acceleration field in the VPD to indicate that guest software can read or write the interruption-control registers without invoking the VMM on each access. The VMM can establish the values of these registers before any virtual interruption is delivered and can revise them before the guest interruption handler returns."
SYSENTER: Executes a fast call to a level 0 system procedure or routine. This instruction is a companion instruction to the SYSEXIT instruction. The SYSENTER instruction is optimized to provide the maximum performance for system calls from user code running at privilege level 3 to operating system or executive procedures running at privilege level 0.
SYSEXIT: Executes a fast return to privilege level 3 user code. This instruction is a companion instruction to the SYSENTER instruction. The SYSEXIT instruction is optimized to provide the maximum performance for returns from system procedures executing at protections levels 0 to user procedures executing at protection level 3. This instruction must be executed from code executing at privilege level 0.
You can find the complete IA-32 Opcode Dictionary at the modseven.de website or via google.
"Interrupt virtualization. VT-x and VT-i both provide explicit support for the virtualization of interrupt masking. VT-x includes an external-interrupt exiting VMexecution control. When this control is set to 1, a VMM prevents guest control of interrupt masking without gaining control on every guest attempt to modify EFLAGS.IF. Similarly, VT-i includes a virtualization-acceleration field that prevents guest software from affecting interrupt masking and avoids making transitions to the VMM on every access to the PSR.i bit.
VT-x also includes an interrupt-window exiting VM-execution control. When this control is set to 1, a VM exit occurs whenever guest software is ready to receive interrupts. A VMM can set this control when it has a virtual interrupt to deliver to a guest. Similarly, VT-i includes a PAL service that a VMM can use to register that it has a virtual interrupt pending. When guest software is ready to receive such an interrupt, the service transfers control to the VMM via the new virtual external interrupt vector."
"Access to hidden state. VT-x includes in the guest-state area of the VMCS fields corresponding to CPU state not represented in any software-accessible register. The processor loads values from these VMCS fields on every VM entry and saves into them on every VM exit. This provides the support necessary for preserving this state while the VMM is running or when changing VMs."
Macbook and wifi
Installation of ubuntu on a macbook is very very simple, just take the normal steps of installing ubuntu. however the wifi drivers is a story on its self. If you are installing Ubuntu on a macbook.... don't do what i did, just follow the guide of installing ath9k driver and you will be ready to go. It is part of a ubuntu howto on installing on a macbook.
You can install the ath9k drivers, you can also make wifi on a macbook with ubuntu working with madwifi or a ndiswrapper. it is all in the guide so just follow the guide and you will be able to run ubuntu on a macbook.
Monday, December 01, 2008
HOWTO Oracle descriptive flexfields
In short, a descriptive flexfield gives you in Oracle E-business suite the possibility to extend the information which you by default can enter. For example when you enter information about a product in de item master you can provide a number of default values. In some cases you would like to give the users the possibility to enter more information which is not by default setup by Oracle because they are very specific for your business. In this example we will add a couple of descriptive flexfields to the Item table in Oracle E-Business suite.
First of all we identify the screen where we want the flexfields to be shown, in this case this is the Master Item screen under the Inventory responsibility. Remember, if we create a flexfield for this screen it will show up under every responsibility so it will also be shown when you request this screen via, for example, the Order Management Super User responsibility.
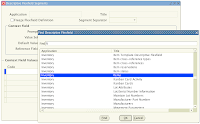
Now we know the screen and we switch responsibilities to the Application Developer responsibility. Here we select the following from the menu: Flexfield - Descriptive - Segments. This will open the screen as shown below, we have to find the correct flexfield segment, in this case this is Application : Inventory and Title : Items.
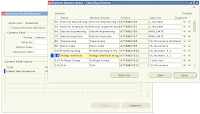
Now we have find the correct descriptive flexfield segments we can select segments, we can for example add the flexfield test by simply adding a record. By setting the value set you can define to which conditions the field is bound. For example only numbers, only characters, only 5 numbers, only 5 characters... etc etc. There are a couple of pre-defined values however you can also create your own if needed.
You can also open the record and set some extra things, like is the field required, set a default value for the flexfield, set a range, etc etc.
When you are done you can save your work and close the flexfield screens. What you have to remember is that you have to run a concurrent program to compile the new flexfields. You can run the concurrent request "Compile Descriptive Flexfields", here you can specify which flexfield you want to compile. If you have some more time you can also re-compile all descriptive flexfields by running the concurrent request "Compile All Flexfields", no parameters needed. After one of those 2 is completed successfully the flexfields are available for use. Remember, you can only create as many flexfields per database table as defined, a good indicator is looking in the table and look how many ATTRIBUTE(x) columns are defined.